반응형
1. MariaDB 설치
apt -y install mariadb-server

character set 변경(필요할 경우)
vi /etc/mysql/mariadb.conf.d/50-server.cnf

mariadb 재시작
systemctl restart mariadb
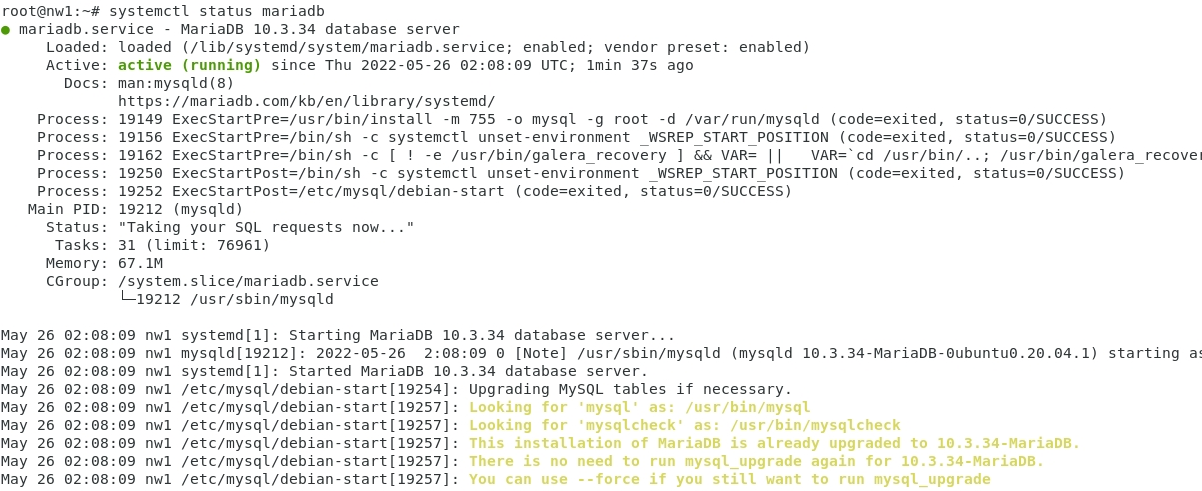
mariadb 정상 구동 확인
systemctl status mariadb

2. MariaDB 초기 설정
mysql_secure_installation 명령어를 통해 MariaDB 초기 설정을 진행 합니다.
| root@nw1:~# mysql_secure_installation NOTE: RUNNING ALL PARTS OF THIS SCRIPT IS RECOMMENDED FOR ALL MariaDB SERVERS IN PRODUCTION USE! PLEASE READ EACH STEP CAREFULLY! In order to log into MariaDB to secure it, we'll need the current password for the root user. If you've just installed MariaDB, and you haven't set the root password yet, the password will be blank, so you should just press enter here. Enter current password for root (enter for none): OK, successfully used password, moving on... Setting the root password ensures that nobody can log into the MariaDB root user without the proper authorisation. You already have a root password set, so you can safely answer 'n'. # root 패스워드 설정 Set root password? [Y/n] y New password: Re-enter new password: Password updated successfully! Reloading privilege tables.. ... Success! By default, a MariaDB installation has an anonymous user, allowing anyone to log into MariaDB without having to have a user account created for them. This is intended only for testing, and to make the installation go a bit smoother. You should remove them before moving into a production environment. # anonymous users 삭제 Remove anonymous users? [Y/n] y ... Success! Normally, root should only be allowed to connect from 'localhost'. This ensures that someone cannot guess at the root password from the network. # 원격 root 로그인 차단 Disallow root login remotely? [Y/n] y ... Success! By default, MariaDB comes with a database named 'test' that anyone can access. This is also intended only for testing, and should be removed before moving into a production environment. # test database 제거 Remove test database and access to it? [Y/n] y - Dropping test database... ... Success! - Removing privileges on test database... ... Success! Reloading the privilege tables will ensure that all changes made so far will take effect immediately. Reload privilege tables now? [Y/n] y ... Success! Cleaning up... All done! If you've completed all of the above steps, your MariaDB installation should now be secure. Thanks for using MariaDB! root@nw1:~# |
3. MariaDB 접속 및 테스트
# root 계정으로 mariaDB 접속 root@nw1:~# mysql Welcome to the MariaDB monitor. Commands end with ; or \g. Your MariaDB connection id is 44 Server version: 10.3.34-MariaDB-0ubuntu0.20.04.1 Ubuntu 20.04 Copyright (c) 2000, 2018, Oracle, MariaDB Corporation Ab and others. Type 'help;' or '\h' for help. Type '\c' to clear the current input statement. # default 인증 MariaDB [(none)]> show grants for root@localhost; +--------------------------------------------------------------------------------------------------------------------------------------------------+ | Grants for root@localhost | +--------------------------------------------------------------------------------------------------------------------------------------------------+ | GRANT ALL PRIVILEGES ON *.* TO `root`@`localhost` IDENTIFIED VIA unix_socket USING '*2C8DB48367F230AE366C7117C12F354077916B4A' WITH GRANT OPTION | | GRANT PROXY ON ''@'%' TO 'root'@'localhost' WITH GRANT OPTION | +--------------------------------------------------------------------------------------------------------------------------------------------------+ 2 rows in set (0.000 sec) # user list 확인 MariaDB [(none)]> select user,host,password from mysql.user; +----------+-----------+-------------------------------------------+ | user | host | password | +----------+-----------+-------------------------------------------+ | root | localhost | *xxxxxxxxxxxxxxxxxxxxxxxxxxxxxxxxxxxxxxxx | +----------+-----------+-------------------------------------------+ 3 rows in set (0.000 sec) #데이터베이스 목록 확인 MariaDB [(none)]> show databases; ERROR 1064 (42000): You have an error in your SQL syntax; check the manual that corresponds to your MariaDB server version for the right syntax to use near 'database' at line 1 MariaDB [(none)]> show databases; +--------------------+ | Database | +--------------------+ | information_schema | | mysql | | performance_schema | +--------------------+ 4 rows in set (0.001 sec) # test_database 생성 MariaDB [(none)]> create database test_database; Query OK, 1 row affected (0.001 sec) # test_table 생성 MariaDB [(none)]> create table test_database.test_table (id int, name varchar(50), address varchar(50), primary key (id)); Query OK, 0 rows affected (0.003 sec) # test_table에 insert 쿼리 MariaDB [(none)]> insert into test_database.test_table(id, name, address) values("001", "Ubuntu", "Korea"); Query OK, 1 row affected (0.001 sec) # test_table 에서 insert 한 값 확인 MariaDB [(none)]> select * from test_database.test_table; +----+--------+---------+ | id | name | address | +----+--------+---------+ | 1 | Ubuntu | Korea | +----+--------+---------+ 1 row in set (0.000 sec) # test_database 삭제 MariaDB [(none)]> drop database test_database; Query OK, 1 row affected (0.002 sec) MariaDB [(none)]> exit Bye root@nw1:~# |
반응형
'IT > 그 외 IT' 카테고리의 다른 글
| [OpenStack] 2. Keystone 설정 (0) | 2022.05.30 |
|---|---|
| [OpenStack] 1. Openstack Xena 설치 (0) | 2022.05.28 |
| [Tools] 무료 폴더 및 파일 비교 툴 - WinMerge (0) | 2022.04.29 |
| Themida - 디버깅 툴을 종료 후 MagicLine4NP를 이용해 주세요/ 동작중인 디버거가 발견되었습니다. 디버거를 종료후 사용하시기 바랍니다. (0) | 2022.04.22 |
| Rest API 테스트용 툴 - Postman (0) | 2022.04.19 |


댓글